Restoration of defocused and blurred images. Practice
Recently I published the first part of this article to restore the defocused and blurred images, which describes the theoretical part.
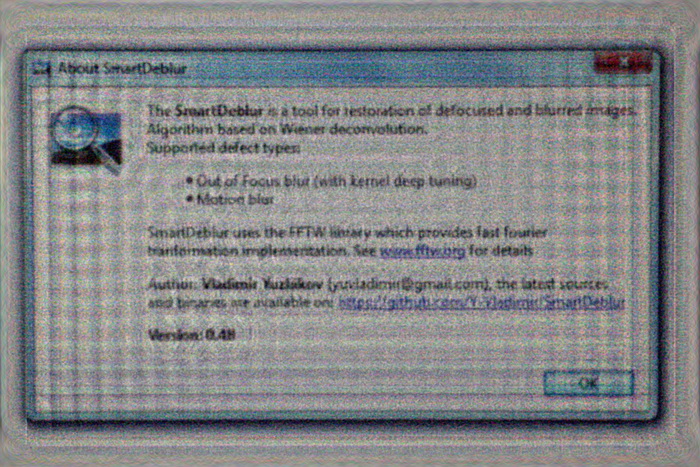
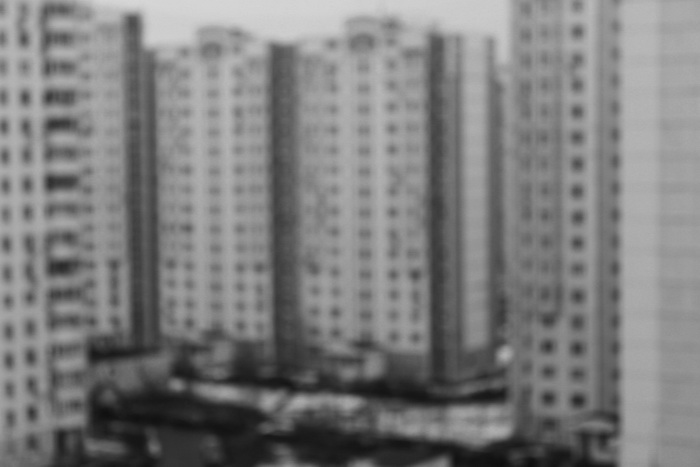
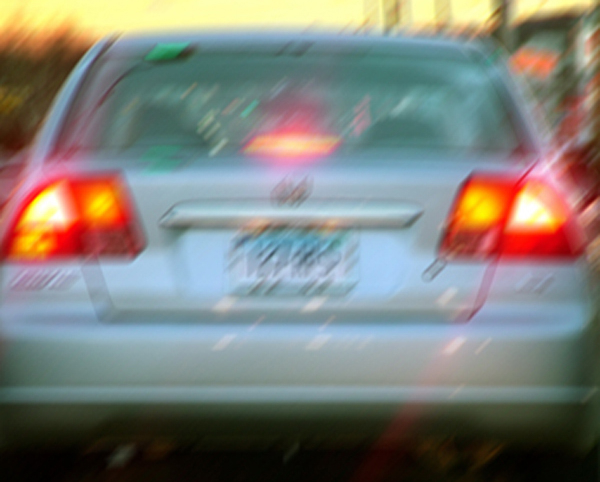
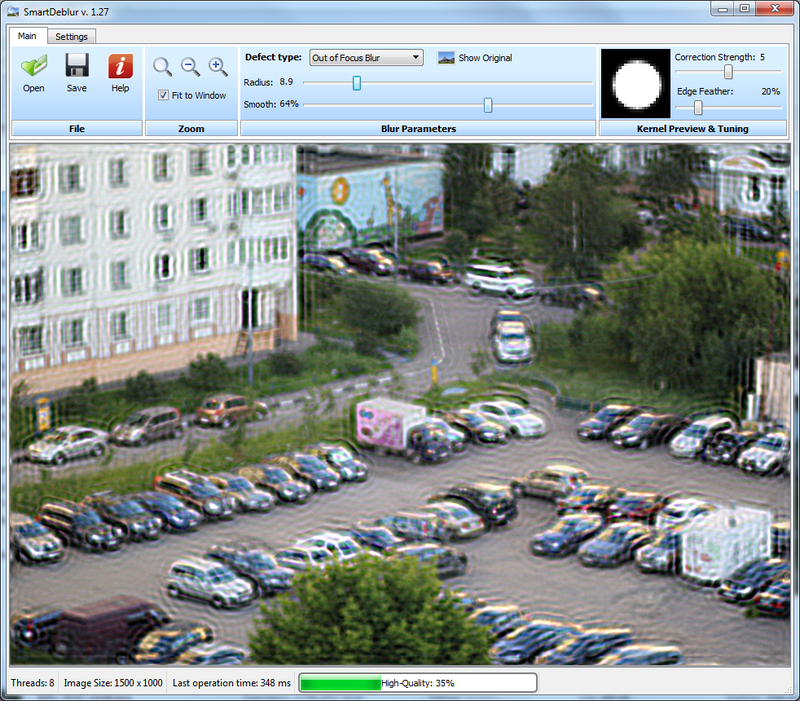
This theme has caused a lot of interest and I decided to continue in this direction and show you what kind of problems arise in the practical implementation of apparently simple formulas. Below is the result of processing of a real blurred image (not with artificial blurring). The source image was made with the camera Canon 500D. Focusing was done manually, in order to get blurring. As we can see, the text is absolutely unreadable, we may only distinguish Windows 7 dialog window.

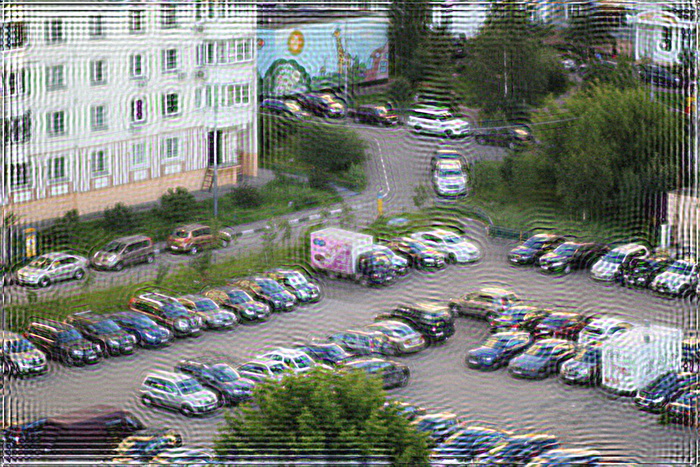
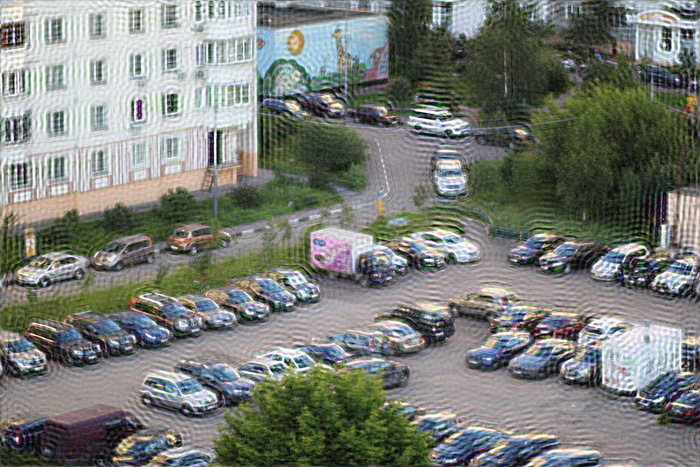
SmartDeblur's result:
Almost all the text can be easily read, though there appeared some characteristic distortions.
Recall the theory
A detailed theory description was presented in the first part, but nevertheless recall briefly the main points. In the process of blurring the each pixel of a source image turns into a spot in case of defocusing and into a line segment (or some path) in case of a usual blurring due to movement. All those overlap each other, which fact results in a blurred image. The principle, according to which one pixel becomes spread, is called the blurring function. Other synonyms - PSF (Point spread function), kernel and other.
We need to somehow reverse the convolution, bearing in mind the noise. But it is not so easy to get f(x, y) from g(x, y) - if we calculate it straightforward, then we will get a huge set of equations.
But the Fourier transform comes to the rescue. There is the so called convolution theorem, according to which the operation of convolution in the spatial domain is equivalent to regular multiplication in the frequency domain (where the multiplication - element-by-element, not matrix one). Correspondingly, the operation which is opposite to convolution is equivalent to division in the frequency domain, i.e. this can be expressed as follows:
 |
(1) |
Where all elements are Fourier functions:
F(x, y) - source image (non-blurred)
H(x, y) - blurring function
N(x, y) - additive noise
G(x, y) - blurring result image
So, we need to recover the maximum approximation to the original image F(u,v). Simply dividing the right and left sides on the H(u,v) does not work, because the presence of even a small noise (as it always is in the real image), the summand N(u,v) / H(u,v), will dominate, leading to the fact that the original image will be completely hidden under the noise
There are approaches, which take into account the presence of noise in an image - one of the most popular and the first ones, is Wiener filter. It considers the image and the noise as random processes and finds such a value of f' for a distortion-free image f, that the mean square deviation of these values was minimal. The minimum of such deviation is achieved at the function in the Frequency domain:
 |
(2) |
The S function denotes here the energy spectrum of noise and of the source image respectively - as these values are rarely known, then the fraction Sn / Sf is replaced by some constant K, which can be approximately characterized as the signal-noise ratio.
Methods of getting PSF
So, letӳ take the Wiener filter, which has already been described, for the starting point נgenerally speaking, there are many other approaches, but they give approximately the same result. So, all descriptions given below, are also applicable to other deconvolution methods.
The main task נis to get evaluation of the point spread function (PSF). This can be done in several ways:
1. Modeling. It is very hard and time-taking, because modern camera lenses consist of tens of different lenses and optical elements, some of which have non-spherical shape, each type of glass has its unique characteristics of refraction of beams with different wavelengths. As a result, correct calculation of light propagation in such a complex optical system, taking into account the influence of the apperture, rereflection, etc., becomes almost impossible. And it can be rather solved only by developers of modern lenses.
2. Direct observation. Letӳ remember that PSF נis what each point of an image turns into. I.e. if we make the black background and add one white point to it, and then make a picture of it with the required defocusing value, then we will get a direct view of PSF. It seems easy, but there are many peculiarities and nuances.
3. Calculation or indirect observation. Letӳ study the formula of (1) the distortion process and think, how we can get H(u,v)? The solution comes up quick נwe need to have the source F(u,v) and blurred G(u,v) of an image. Then, if we divide Fourier-blurred image by Fourier-source image, we will get the required PSF.
About bokeh
Before we pass on to details, I will give some defocusing theory in relation to optics. An ideal lens has circle-shaped PSF, so each point turns into a circle of some diameter. By the way, it is surprising for many people, because from the first sight it seems that defocusing just stumps the whole image. This fact also explains why Gaussian blur from Photoshop does not at all look like the background image (it is also called bokeh), which we see through the lens. In fact these are two different blurring types נaccording to Gauss, each point turns into a non-distinct spot (Gaussian bell), and defocusing turns each point into a circle. Accordingly, results differ too.
But there are no ideal lenses and in a real situation we get this or that deviation from an ideal circle. This is what forms a unique bokeh pattern of each lens, making photographers spend a lot of money on lenses with a beautiful bokeh :) Bokeh can be figuratively divided into three types:
נNeutral. This is the maximum approximation to a circle.
נSoft. When edges have lower brightness, than the center.
נSharp. When edges have higher brightness, than the center.
The image below illustrates this:

Moreover, the bokeh type נsoft or sharp depends also on whether the focus is front or rear. I.e. whether the camera is focused before the object or behind it. For example, if a lens has a soft bokeh pattern in the front focus (when, letӳ say, the focus is on a face, and the background is blurred), then in the rear focus the bokeh pattern of the same lens will be sharp. And vice versa. Only the neutral bokeh does not change due to the focus type.
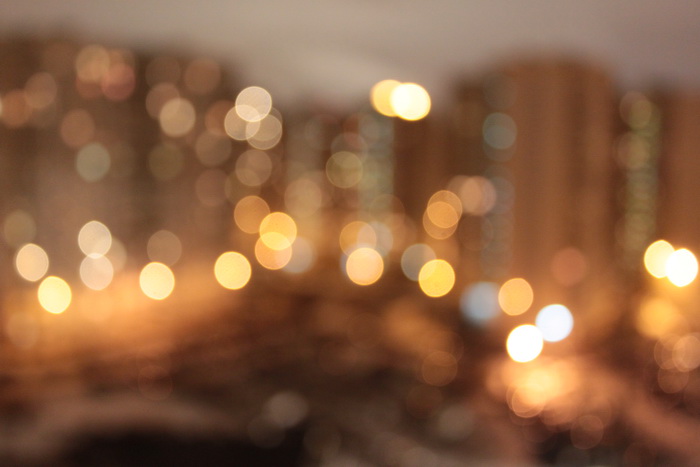
But this is not all נas these or that geometrical distortions are incident to each lens, then the PSF type depends also on the position. In the center נalmost a circle, on edges נellipses and other oblate figures. This is well seen on the next photo נpay attention to the lower right angle:
Now let us discuss the last two PSF obtaining methods.
PSF - Direct observation
As it was said above, it is required to create the black background and a white point on it. But it is not enough to print just one point on a printer. We need a much higher difference in brightness of the black background and the white point, because one point will be blurred on a large circle נaccordingly it should have higher brightness, in order to be visible after blurring.
For this purpose I printed the Malevichӳ black square (yes, I spent a lot of toner, but the lengths you have to go for science!), applied foil to the other side, because a sheet of paper shows through very well, and pierced it with a needle to make a small hole. Then I created an ingenious assembly made of 200-watt bulb and a ԳandwichԠof a black sheet of paper and foil. This is what it looked like:

Then I turned the bulb on, covered it with the sheet, turned the ambient light off and made several pictures using two lenses נkit-type lens Canon EF 18-55 and the portrait lens Canon EF 85mm/1.8. From the pictures I made, I cut PSF and then built profile graphs.
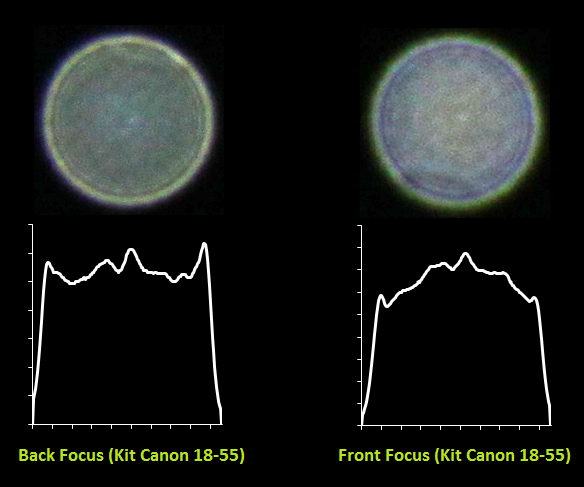
This is the result for the kit lens:
And for the portrait lens Canon EF 85mm/1.8:
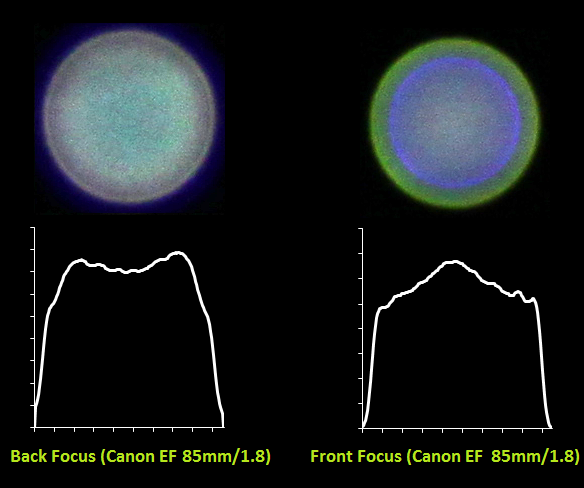
It is well seen how the bokeh character changes from sharp into soft for one and the same lens in case of front and rear focus. It is also seen what a complex form PSF has נit is far not an ideal circle. For the portrait lens we also see large chromatic aberrations due to large lens aperture 1.8.
Here is another couple of pictures with the diaphragm of 14 נwe can see from it, how the shape changed from a circle into a regular hexagon:

PSF - Calculation or indirect observation
The next approach נis indirect observation. For this purpose, as it was said above, we need to have the source F(u,v) and blurred G(u,v) image. How can we get them? Very easily נwe need to fix the camera on a tripod and make one sharp and one blurred picture of one and the same image. Then using division of Fourier-picture of a blurred image by Fourier-picture of the source image we will get Fourier-picture of our sought PSF. Then if we use inverse Fourier transform, we will get direct PSF.
I made two pictures:

As a result I got the following PSF:
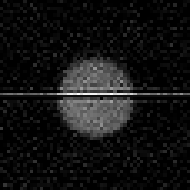
Ignore the horizontal line, this is an artifact, which appeared after Fourier transform in the Matlab. The result is, letӳ say, average נmany noises and PSF details are not seen very well. Nevertheless, the method has the right to existence.
Described methods can be and have to be used for creation of PSF during restoration of blurred images, because the quality of source image restoration depends directly on how close this function is to the real one. When the supposed and the real PSF do not coincide, there will be seen numerous artifacts in the form of Էavy blurringԬ haloing and decrease of sharpness. In most cases circular PSF is supposed, but in order to reach the maximum degree of restoration it is recommended to play with the shape of this function, by trying several variants from widespread lenses נas we saw, PSF may vary significantly, depending on the diaphragm, lens and other conditions.
Edge effects
The next problem consists in the fact that if we use the Wiener filter directly, then we will see a peculiar Էavy blurԠon edges of the image. In hand-waving terms the reason for it consists in the following נwhen deconvolution is performed for those points, which are located on edges, then during assembling we lack pixels, which are located beyond edges of the image and they are either taken as zero, or taken from the opposite side (depends on realization of the Wiener filter and Fourier transform). This is what it looks like:
One of ways to avoid this consists in preprocessing of image edges. They are blurred using the same PSF. In practice this can be done in the following way נwe take the source image F(x,y), blur it using PSF and get F'(x,y), then the final source image F''(x,y) is formed by adding F(x,y) to F'(x,y) using the weight function, which in edges gets the value 1 (the whole point is taken from blurred F'(x,y)), and at the distance equal to (or exceeding) the PSF radius from the image edge it gets the value 0. And as the result the wavy blurring at edges disappeared:
Comparison
It remains to compare the processing quality with commercial software.
I chose the two most well-known programs
1. Topaz InFocus - www.topazlabs.com/infocus/
2. Focus Magic - www.focusmagic.com/
For cleanliness of experiment we will take advertising images from the official sites - this will make sure that the compared programms have the optimal processing parameters (because I think the developers carefully selected images and choose parameters before publication in advertising on the site.) Let's consider the first example - motion blurring restoration:
Example from Topaz InFocus's web site:
 |
 |
 |
| SmartDeblur's result | Topaz InFocus's result |
Parameters value used in the example above - Type: Motion Blur, Length: 10.1, Angle: -45, Smooth: 60%
The results are very similar, this indicates that Topaz InFocus uses the similar deconvolution algorithm and adds post-processing in the form of smoothing, noise removal and edge enhancement.
Examples of strong defocusing on the website of the program could not be found, and this plugin is not designed for this (maximum blur radius is only a few pixels).
It may be noted one more thing - the angle was exactly 45 degrees, and the length blurring 10 pixels. This suggests that the image is blurred artificially. In favor of this fact - recovery result is very good, which is not typical for real images (as will be shown below).
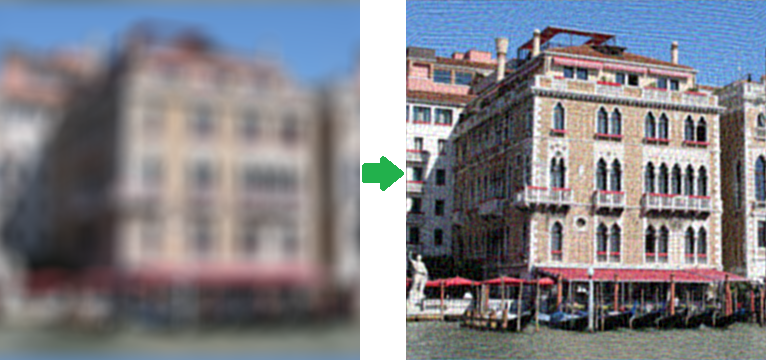
So, let's go to the next example - defocus restoring. First of all get the advertisement image from Focus Magis's oficial site: www.focusmagic.com/focusing-examples.htm
 |
Result:
 |
 |
| SmartDeblur's result | Focus Magic's result |
There is not so obvious is what it is better.

Initial image

SmartDeblur's result (Type: Out of Focus, Radius: 5.9, Smooth: 60%)

Topaz InFocus's result (Type: Out-of-Focus, Radius: 5.5, Suppress Artifacts: 0.34)
A draw. The parameters for each program were selected so as to provide the best quality.
Announcement of the Blind deconvolution Module
Let me announce the next version of SmartDeblur which will have a blind deconvoltion module for the Motion Blur restoring. The new module will analyze blurred images automatically and determine PSF/kernel - like the technique demonstrated by Adobe. The main point - kernel may have a more complex shape.
You can see examples below:
Example 1 - Development (real image)
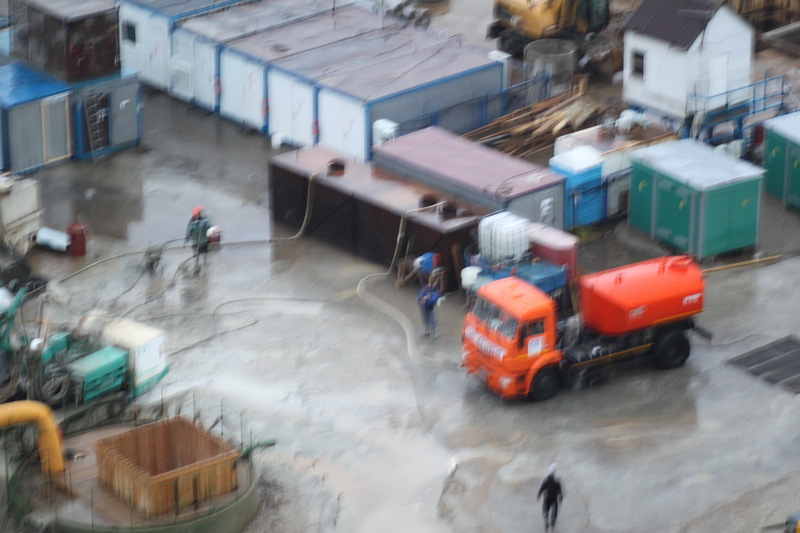
| Kernel |

|
Result

As you can see - the complex kernel was identified successfully.
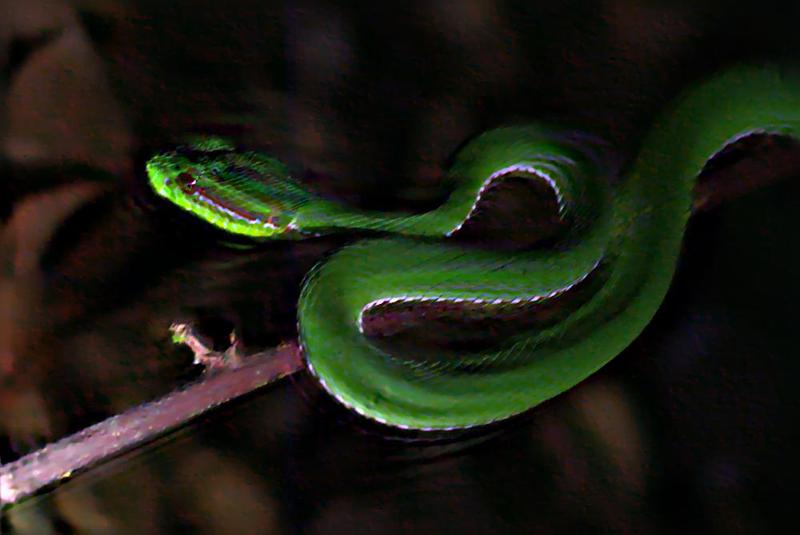
Example 2 - Snake (real image)
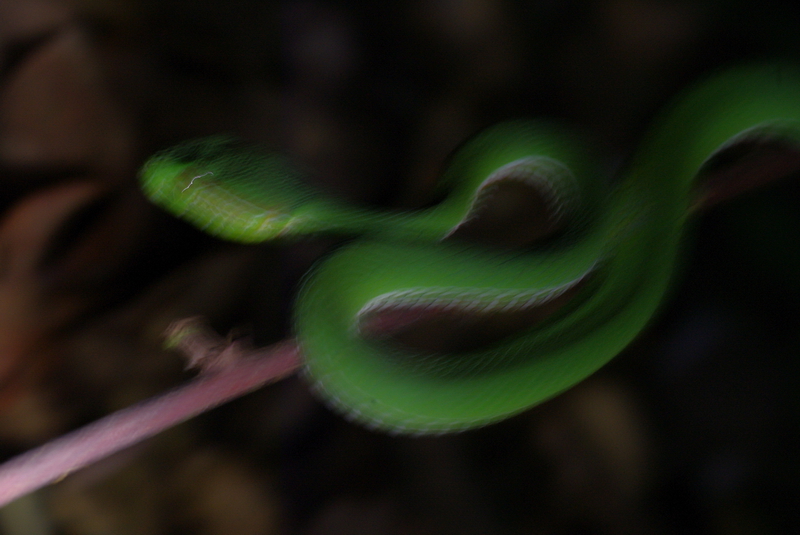
| Kernel |
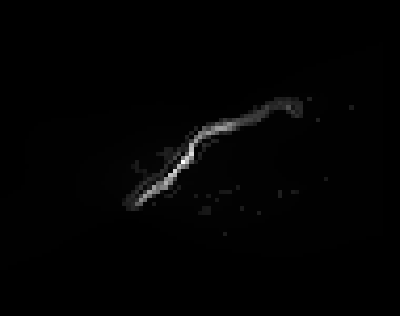
|
Result
Conclusion
At this point I would like to finish this article. However, I wanted to write about many other things, but the text is already quite long. I will be very grateful if you try to download SmartDeblur and try it out on real images נunfortunately I do not have very many defocused and blurred images, I deleted them all :)
Who will try the program - please note that the Smooth parameter in the preview mode and in the High-Quality mode behaves slightly differently. So the final result of smoothing slider can be assessed only after rendering High-Quality. And I will be very grateful if you send to me (you can find the e-mail in the profile) your feedback and examples of successful/failed restorations. I also want to ask you to report about all bugs, send your comments and suggestions נbecause the application is still a little "raw" and a bit unstable.
The main issue that remains - recovering result has noticable ringing effects in places with light objects. I think this is due to the fact that light values from the digital sensors are not linear, so it gives wrong interpretation of actual brightness. May be brightness logarithmic preprocessing is needed or something else.
Once again remind:
Windows-binaries can be downloaded by URL below:
github.com/downloads/Y-Vladimir/SmartDeblur/SmartDeblur-1.27-win.zip
Mac version (please note I didn't test it!):
https://github.com/Y-Vladimir/SmartDeblur/blob/master/dist/SmartDeblur-1.27-mac-v2.dmg
Sources (under GPL v3 license): github.com/Y-Vladimir/SmartDeblur
If you have any questions please contact me by email - I will be happy if you give me any feedback regarding this article and SmartDeblur.
 (Vladimir Yuzhikov)
P.S. Russian translate can be found here
Social links
Discussion on Reddit
Discussion on Gizmodo
Discussion on Hacker News
| Tweet |